Showing posts with label preserving. Show all posts

Saturday, August 29, 2015

COUNTER CULTURE

     I was honoured to be invited to present a workshop on fermenting at Bridgewater's Up!Skilling Expo last weekend. My first instinct was to share my absolutely favourite recipe for Dill Pickled Cucumbers and Beans with everyone because they are so easy to make, and taste amazing! It's hard to believe that this very classic (and healthy) recipe and method for making pickles has virtually disappeared from our kitchen cultures. Good thing fermenting is experiencing a serious revival because I honestly can't imagine life without these babies.
Like I discuss in the video, fermented beans and cucumbers are a great way to preserve fresh vegetables from your garden, while at the same time making them more digestible and inoculating your system with beneficial probiotics. Amazing eh?!
DILL PICKLES AND BEANS
via Lacto-Fermentation

a couple of handfuls of fresh organic string beans, stems removed and/or
about 6-7 organic pickling cucumbers
3 Tbsp unrefined sea salt
fresh organic dill blossoms
fresh organic garlic cloves, peeled
1/2 Tbsp organic mustard seeds
5 cups filtered water
clean mason canning jars

Method: Place a dill blossom, a couple of cloves of garlic, and the mustard seeds in the jar. Then fit in as many cucumbers or green beans as you can. In a glass measuring bowl, dissolve the salt in the water and then pour over the vegetables, being sure to cover them completely. Screw on lids and place the jar on a plate or in a bowl to catch any potential overflow, and place on your counter or on top of your fridge for about 3 days. You'll know they are done fermenting when the brine becomes cloudy and the vegetables turn a darker shade of green. Store in a cool place like a cold cellar or refrigerator. Enjoy!

Friday, August 14, 2015

WILD BERRY JAM

     I never thought I'd find something positive to say about the forest that was clearcut next to our farm. For years it was actually a part of this farm, until the old man who owned it died and the property was subdivided. He responsibly harvested his firewood off that land for years, and with a lot of respect and care. Unfortunately someone decided to sell the trees for profit and after a few years of growth, trees are coming back. And so are berries! For the last three summers I've tramped through the wilderness of the new growth and manage to collect enough berries to make a batch of wild berry jam. This time the kids came with me and were very eager to show me where all the "good" spots for picking were - as well as mossy patches for rest and renewal.
     I am a big fan of pectin-less jams as I suspect the methods of manufacturing pectin are less than natural or healthy. Last year I made a lovely batch of wild raspberry jam sans pectin and it turned out great. Our harvest this year was composed of predominantly blackberries and huckleberries, with a few raspberries and blueberries as well. I've heard that blackberries are high in pectin and don't require the use of the packaged stuff to gel, so I hoped that since they made up the bulk of the bunch I'd end up with a nice thick jam. I was lucky, the jam turned out well. It was a small production though, just 4 jars. Since we had so much fun foraging today, maybe we'll go for another round in a few days.


WILD BERRY JAM with Honey

6 cups mixed wild berries, rinsed
3 cups local honey

Method: Place the berries and honey in a saucepan over medium heat. Bring to a rolling boil and cook, stirring occasionally for about 25-30 minutes. Spoon into sterilized canning jars, and heat process for about 10-15 minutes. Once opened, I find freezing the jam ensures that it won't go mouldy by the next time we are in the mood for a spoonful!
 

Wednesday, August 12, 2015

TASTY TURMERIC

     Even my father-in-law is aware of the health benefits of turmeric. It's become all the rage these days, and for good reason. It's about time too, seeing as it has been used in India for thousands of years as a spice and medicinal herb. The main active ingredient in turmeric is curcumin which has powerful anti-inflammatory effects and is a strong anti-oxidant. Low levels of inflammation in the body is responsible for most chronic diseases, and oxidative damage in the body is a factor in ageing and disease. Can you see why everyone's so excited about turmeric and curcumin?!  Curcumin is also linked to improvement in brain function and lowered risk of heart disease. So while turmeric itself has relatively low levels of curcumin, the supplemental extract is your best bet if you have chronic illness or inflammation.
     That being said, eating turmeric daily is a great way to benefit from the tonic effects of curcumin. In order to fully absorb the medicinal properties of turmeric, it is best consumed with fat and black pepper. Or just eat Indian food. A lot. Like we did last night. Not only did we eat a whack of turmeric, I also found an amazing way to eat the zucchini that are beginning to overflow in the fridge from my daily harvesting in the garden. 
I am in fall preparation mode, so I doubled this recipe and froze half of it to reduce meal preparation. With both kids in school this year, I have lots of time to work and don't want to waste it making dinner and washing dishes!
TOOR DAL CURRY
(Yellow Split Pea Curry)

1 pound organic split yellow peas, soaked overnight
about 1 litre water
2 tsp organic turmeric powder
8 cloves organic garlic, crushed
2 cm piece organic ginger, peeled and grated
sea salt to taste
4 Tbsp organic coconut oil
2 tsp organic black mustard seeds
4 tsp organic cumin seeds
3 dry chillies (optional)
2 pinches asafoetida powder
2-3 organic tomatoes, chopped
organic ground black pepper

Method: Drain the peas and place in a pot with the water and turmeric and boil for 45-60 minutes, or until the peas are soft.
Meanwhile, pound the garlic, ginger, and a pinch of salt in a mortar and pestle to form a paste. Heat the oil in a small frying pan over low heat. Add the mustard seeds and allow them to pop. Add the cumin, chillies, asafoetida and the garlic/ginger paste and fry until fragrant. Stir into the dhal. Season to taste with salt. Add the chopped tomato and simmer for another 10 minutes. Garnish with coriander leaves.
ZUCCHINI & PEPPERS

2 lbs organic zucchini, halved and sliced
2 organic green peppers, chopped
1/4 cup organic ghee or butter
1/2 tsp organic turmeric powder
1 tsp organic cumin seed
1 tsp crushed chillies
1/4 tsp sea salt
organic ground black pepper

Method: Heat a large cast iron skillet over medium high heat. Melt the ghee and add the cumin, chillies, and turmeric. Heat and stir until fragrant. Add the zucchini, peppers and salt. Cook, stirring often until the vegetables release their water and evaporates, producing a nice spicy gravy, about 10-12 minutes.

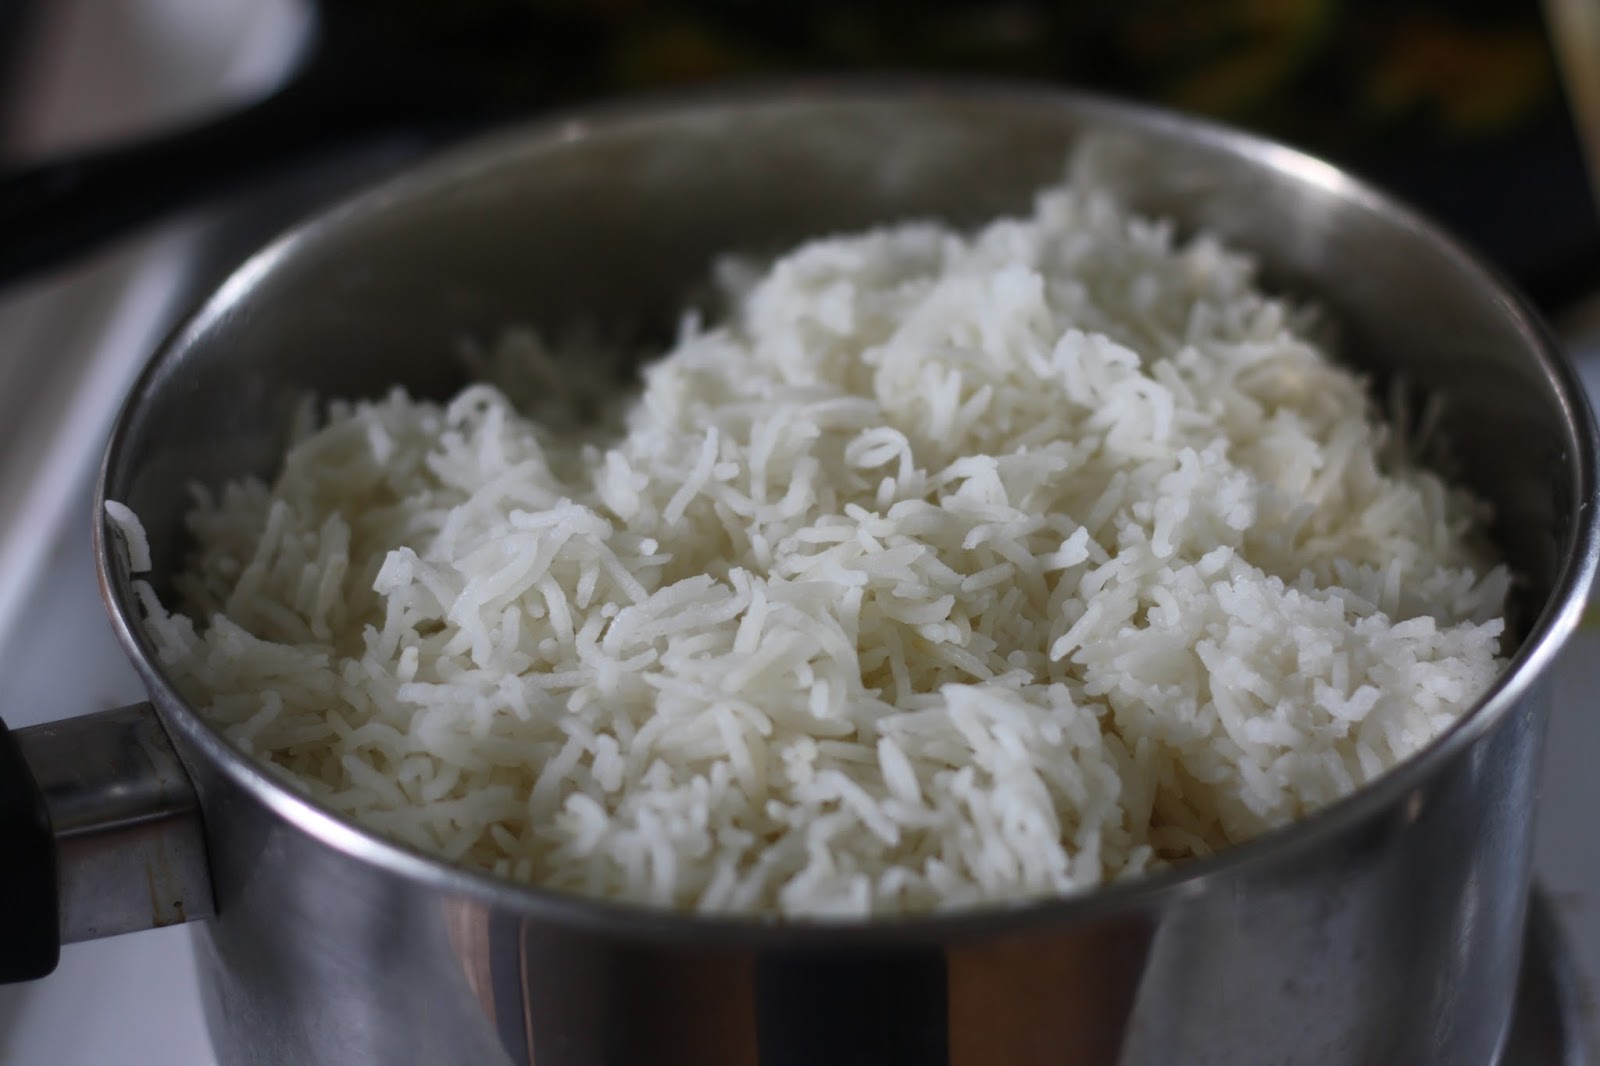
Serve both dishes with steamed basmati rice, chutneys, and yogurt or raita. 
You can also try out this recipe I discovered last summer when I was making all my preserves. It's an Indian-style zucchini chutney which might come in handy if you tend to plant way too many zucchini plants like I do.
KASOUNI
(Zucchini & Eggplant Chutney)

125 grams organic ginger, peeled 
65 grams fresh organic garlic, peeled 
60 grams organic green chilli (or less)
25 ml organic apple cider vinegar
125 ml organic sunflower oil
45 grams organic black mustard seeds
15 grams organic turmeric powder
45 grams organic cumin powder
30 grams dried organic chilli flakes (or less)
225 ml more apple cider vinegar
125 grams organic coconut sugar
35 grams sea salt
700 grams organic zucchini, peeled and grated
300 grams organic eggplant, peeled and grated

Method: Place the ginger, garlic and green chilli in a blender with 25 ml of vinegar, and mince.
Heat the oil until it is very hot and then add the mustard, turmeric, cumin, and chilli flakes and stir for a few minutes. Watch to make sure it doesn't stick or burn.
Add the garlic puree and cook for another few minutes.
Add the remaining ingredients, stir and let it simmer gently for one hour.
It is ready when the oil rises to the top and it has thickened.
Pour into sterilized mason jars and process in a hot water bath for 12 minutes. Refrigerate once opened.

Saturday, September 1, 2012

KEEPING THE CROP


 Garden harvesting is in full swing, and each day finds me out in the garden and then into the kitchen to preserve the bounty.  To make things a little extra challenging this year, I must find ways to preserve the harvest that do not rely on freezer space.  We are moving in a few weeks and will be downsizing to one refrigerator.  In other words, we are going from a house with a deep freeze and two upright refrigerators/freezer units down to just one!  Day by day I am using up whatever we've had stored in these freezers, but I am starting to wonder how I am going to work with less freezer storage.  


     Our garden produces so much kale each summer that I usually blanch and then freeze it in Mason jars.  I did some of that this year, but I am also trying out a couple of new techniques.  The first idea I got from my sister who really loves kale.  I was over at her house one day and noticed she was juicing a lot of kale and then pouring the juice into an ice cube tray and freezing it so that she could use cubes of kale juice in her smoothies in the winter.  It's a great way to use up lots of kale and very little freezer space, which is perfect for me.
     I've also been giving my dehydrator a work out drying kale.  This way I can powder it and add it to whatever I like in the winter - popcorn, soups, smoothies, baby food - really the possibilities are endless.     
     I am also back into the lacto-fermentation groove.  The beets from the garden are now delicious lacto-fermented Pickled Beets.  The cabbages that barely survived a full out attack from some sort of caterpillar army managed to produce a nice large jar of Cortido once I cut off all the nasty bits and removed the critters still living in and on them.  The onions and fatty carrots Scott planted also made their way into the cortido, which was really exciting because pickling is so much more gratifying when you use vegetables from your very own garden.
     It was also high time I dug up the rest of the potatoes and figure out what to do with them until we are ready to eat them.  I had no idea you need to be very careful when you harvest potatoes.  Any little blemish or scratch on the surface of the potato could cause it to spoil and ruin the bunch when they are in cold storage.  Next year I will be extra careful not to stab them with the pitch fork when I dig them up, nor will I carelessly toss them into the basket.
     I had big plans to spend the afternoon packing, but when I got home from the market all I wanted to do was pickle and make immune boosting herbal remedies for the winter.  No one was home, so I went with it.  Besides, something had to be done with all the cucumbers growing in the garden.  Last week I made a batch of my favorite Cucumber Relish, and really wanted to use the rest to make my ultimate sweet sliced dill pickles that taste amazing on sandwiches.  
SWEET SLICED DILL PICKLES
Makes about 5-500ml jars

4 lb organic pickling cucumbers
6 medium sized organic onions
3 cups local honey
4 cups organic apple cider vinegar
1 cup water
1/2 cup sea salt
5 cloves organic garlic
5 heads fresh organic dill

Method:  Slice cucumbers into 1/4" slices, and the onion into thin onion rings.  Set aside.  Combine honey, vinegar, water and salt in a large stainless steel saucepan, bring to a boil.  Add the onion and cucumbers to the liquid and return the mixture to a full boil.  
     Place 1 clove of garlic and 1 head of dill  in a hot jar.  Pack cucumber and onion slices to within 3/4" of top rim.  Add pickling liquid to cover cucumbers to within 1/2" of top rim.  Remove air bubbles, readjust head space and wipe jar rim.  Screw on lidd and place jar in canner.  Repeat.  Return water to boil and process for 10 minutes.
     My oldest son is starting Kindergarten this year, and so I've been getting him prepared for school - getting him a knapsack and clothes, organizing his lunch kit.  I am now starting to think about winter colds and him being exposed to so many children on a daily basis.  The whole family has started taking fermented cod liver oil to bump up our vitamin A & D, not to mention all that essential fatty acid goodness.  While at the health food store I was about to pick up a bottle of elderberry syrup when I suddenly remembered this post by a friend of mine over at Sparrow Tree who shared a simple homemade version.  Now I must admit to having fantasies of finding a spot nearby where wild elderberries grow so I could wildcraft and then make healing syrups, but I have yet to locate this special place.  So, until then I will use dried berries from the store.  This stuff is so delicious, I am pretty sure I won't have any trouble getting my son to take a spoonful of it every day to keep him healthy.  I think I am almost ready to send my little boy off into the world.  Sigh.

Monday, January 9, 2012

MAKING MARMALADE

     It all started when I was reading a Beatrix Potter book out loud to my son .  I wanted to make marmalade.  Now, the crazy thing is that I don't even eat marmalade.  But sometimes I get this nostalgic inspiration that I just can't shake and it makes me want to do crazy things.  This was one of those times where I longed for the times when people made homemade biscuits spread with golden marmalde, spun wool and milked cows.  
So, I got busy.  Very, very busy because making marmalade is a big job.  
     A big job that was made even bigger because I overestimated the number of oranges I would need to make a batch, and ended up making 4 times the amount just to use up the excess.  
     Good thing we just bought a HUGE 40 litre stainless steel pot at Christmas time for brining our turkeys in.  This pot is so big I needed two stove burners to heat the thing.  At first I thought maybe the pot was too big, but then I realized that the large surface area was actually a good thing because it increased the evaporation area which ensured that the marmalade didn't take forever to reduce.  The pot will really come in handy next summer when I preserve tomatoes, and Scott is excited to use it when he is slaughtering chickens.  To each their own.....
     Now marmalade is traditionally made with Seville orange which apparently contain more pectin and are bitter which makes a nice tasting spread.  I didn't realize this when I was planning this mad adventure and just used organic navel oranges from the supermarket.  If I ever find organic Seville oranges, I might try them out, but until then, navel will do.  I am only going to list the method for making a small batch because odds are you don't need 19 jars of marmalade.
ORANGE MARMALADE

2 pounds organic oranges
1 organic lemon
7 cups organic sugar
2 litres of water

Method:  Wash the fruit.  Remove the stem and flower ends of the oranges and lemons.  Cut the fruit in half and squeeze the juices into a sieve, saving the pulp and seeds.  Pour the juice into a large pot.  Scrape and pull out the membranes and remaining pulp from the peels with a small spoon, adding them to the reserved pulp and seeds.   Place the pulp mixture into a large piece of cheesecloth and tie with cooking twine.  Put it into the pot containing the juice.
     Halve the oranges and lemon peels and then cut in half again.  Slice the peels into paper-thin strips and adding them into the pan as well.  Stir in the water and bring mixture to a simmer over medium heat. Simmer, stirring often and pressing the bag to release the pectin for about 2 1/2 hours.  Place a small plate in the freezer.  Remove the bag and allow to cool.  Squeeze the pectin juice out of the bag.  At this point the mixture should measure 7 cups.  Add more water or reduce as necessary to achieve this amount.
     Add the sugar to the pan and bring to a hard boil, stirring.  Boil until the foam clears and it reaches the gelling stage, about 12-15 minutes.  Pour a small amount of the recipe on a cold plate and place it in the freezer for a few minutes.  The product is gelled if it does not run together when separated with a spoon.  (While doing this test remove the mixture from the heat to prevent overcooking.)
     Using a canning funnel, fill hot sterilized canning jars, leaving a 1/4 inch headspace.  Cover with a prepared lid, screw on band and boil in water canner for 10 minutes.

In case you do have an excess of marmalade like I now do, here are some unusual uses for this tasty condiment.

MISO MARMALADE MARINADE

3/4 cup organic white miso
1/2 cup organic freshly squeezed lemon juice
1 cup organic marmalade
sea salt and pepper

Method:  Whisk all ingredients together and use as a marinade for duck, pork, seafood, chicken or fish.

* or you can make this cake from Orangette
* or use it to glaze carrots
* in salad dressings
* in cake frostings
* on a roast chicken sandwich
* mix it with garlic, tamari and ginger for another marinade

Sunday, October 30, 2011

PROJECT ROSEHIPS

Autumn is the time of year to harvest wild rose hips.  They are the beautiful red orbs the roses leave behind after they've blossomed and shed their petals. Everyone is crazy about tropical super foods like goji berries and acai, but what about rose hips?  They are one of the highest sources of Vitamin C!  There is still so much for me to learn about this land I live on, as I have yet to really wander and identify the local flora and fauna.  Our own property doesn't grow very many rose bushes so I was wondering where on earth I could go close by that was plentiful and easy to access between naps and snacks with two kids.  Everyday when we go for a walk I see wild rose hips growing on the side of the road, but know that those are not good for picking and consuming because they've been poisoned by the cars.  So, when I noticed the abandoned house on our street whose yard is full of wild rose bushes I decided to wander on over and pick a few.  That's when I heard the dog bark and the next door neighbour come out onto his deck.  I kept on picking anyway figuring it wasn't his property and I was only gently wildcrafting. We're a pretty harmless and non-threatening crew (wee Faegan and momma with a babe on back) so he left us alone, but I had a feeling he was wondering why we were there.  We came home with a small basket of goodies, but I wanted more rose hips.  That's when I decided to ask my sweet neighbour Karen for help.  They have a gorgeous piece of land next to us, and as it turns out, FULL of rose hips!  I left the babe at home with papa and Faegan and I set out one sunny afternoon to pick to our heart's content.  We were fortunate to even have some help from Karen and her daughter's who picked the prickly rose hips with us.  
We picked until I had to come home to feed the baby and then, when everyone was asleep I got busy preserving the harvest.  I opted for the no-cook methods which preserve the heat sensitive Vitamin C in the fruit.  So now that the harvest is in and "marinating", we can sit back and wait a couple of weeks before we sample the goods.
ROSE HIP VINEGAR

organic local apple cider vinegar
wild rose hips

Method:  Half fill a clean, sterile glass jar with chopped rose hips.  Fill the rest of the jar with vinegar.  Seal with a layer of wax paper to prevent the lid from rusting.  Shake everyday for about 2 weeks and then strain.  Use in salad dressings.


DRIED ROSE HIPS

wild rose hips

Method:  Place whole, clean rose hips in a food dehydrator and dry until all the moisture is removed.  Chop them coarsely in a food processor and then sift to remove the hairs.  Store in a glass jar and use them to make a nutritious tea all winter.

Wednesday, September 28, 2011

LAZY PERSON'S GUIDE TO TOMATO PRESERVATION

After two people suggested I just freeze my tomatoes instead of canning them, I decided to give it at try.  I have no idea if I did it right because I did absolutely no research, but common sense tells me it will probably work out just fine.  Some of the tomatoes were pureed and then frozen in mason jars, while the rest were quartered and frozen.  I don't have enough tomatoes to last me the whole winter or anything, but it will be very nice to reach into the freezer in the dead of winter and pull out a nice sampling of the summer's harvest, frozen in time.

Wednesday, September 14, 2011

DAYS OF HARVEST

The fields and orchards are being harvested, and we are fully celebrating and enjoying the bounty.  As I previously mentioned, I was up to my armpits in tomatoes this week, and so I made 29 jars of homemade salsa and ketchup.  Canning is one of those things that makes a huge mess in your kitchen and totally exhausts you.  By the end of it you really start to wonder why you do these things, and then you turn around and look at jar upon jar of ruby goodness and can't help but feel pretty darn proud of yourself.  Besides, you have a whole year to recover before you do it all over again.  I've already cracked open a bottle of the salsa for breakfast burritos, and ketchup for these awesome potato delights I like to call Flying Saucers.  I am sure someone else has already discovered that it is much easier to make baked french fries if you cut the potatoes into thin disc-like slices instead of frites, but anyway, I like to think I am somewhat innovative and created these.  They tasted awesome dipped into my homemade ketchup.
FLYING SAUCERS


organic potatoes
organic e.v olive oil
sea salt
organic pepper, ground

Method:  Preheat oven to 400*.  Slice the potatoes into 1/2" discs.  Toss in a bowl with olive oil, sea salt and pepper.  Bake in the oven until one side is golden, flip and bake until potatoes are cooked and they are browned.
Tomato massacre.
Loving the Vita Mix for perfect ketchup making puree.
SALSA

    • 10 cups chopped organic tomatoes
    • 5 cups chopped organic green and red peppers
    • 5 cups chopped organic onions
    • 2  cups chopped organic hot pepper
    • 1 1/4 cups organic local apple cider vinegar
    • 6 organic garlic cloves, minced
    • 1/2 cup fresh organic cilantro, minced
    • 3 tsp salt
    • 1 (6 ounce) can organic tomato paste
    • Method:  Combine all ingredients except tomato paste in a large sauce pot.  Simmer until it reaches desired thickness.  Stir in the tomato paste, and then ladle the hot salsa into sterilized jars, leaving 1/4 inch head space.  Wipe rims, seal and process for 15 minutes in a hot water bath.  
This week in mommy kindergarten we are honouring apples by singing about apples, doing fingerplays about apples, telling apple stories, painting and stamping with apples, drawing apple trees on chalkboards, and of course, eating apples!  This morning my son and I made an apple pie together which was a lot of fun, and a lot of yum.  He especially enjoyed using the apple corer/segmenter wheel.  When he tired of that he used my melon baller to dig holes in the flour.
I was so excited about the pie I even called Scott at work to tell him the good news.  Faegan was really proud of himself for making an apple pie too.  It is amazing how much more pleasant our days are together now that we have a nice rhythm going, and spending our mornings on planned activities.  I love it!

APPLE PIE

5-6 cups peeled, cored and sliced organic apples
1/4 cup local maple syrup, or more to taste
1/8 tsp sea salt
1 Tbsp organic corn starch
1/4-1/ 2 tsp organic cinnamon powder
1 Tbsp organic lemon juice

Method:  Prepare the pie dough and let it chill in the refrigerator while you cut and slice the apples.  Preheat oven to 450*.  Place the apple slices in a large bowl and toss with the maple syrup, salt, corn starch, cinnamon and lemon juice.  Remove pie dough from fridge and roll out the bottom crust.  Line a 9" pie plate with it and fill with the apples.  Roll out the other half of dough and cover the pie with the crust.  Prick it with a fork and cut a cross in the centre with a knife.  Bake the pie in the oven at 450* for 10 minutes, then reduce the heat to 350* and bake for 45-60 minutes.

Saturday, September 10, 2011

A TIME FOR TOMATOES

So I'm just warning you now, there might be a lot of talk on here about tomatoes for a little while.  My source at the Farmer's Market (don't ask who, I won't be revealing, in fear the mass hordes of Halifax will descend and rob me of my precious produce) came through with a basket of organic tomatoes for preserving.  I had hoped for 3 bushels, and came away with one, but there is talk of more being available next week perhaps. In any case, there is going to be some major tomato action going on in the kitchen.  So much so that I've enlisted the assistance of my mother in law to come by on Monday to help by watching the wee ones while I mess up the kitchen.  But until then, my little red lovelies are laid out on the spare bed upstairs ripening as we speak.  
If anyone has a kick ass salsa recipe, please share.....thanks!

Monday, September 5, 2011

DIGGIN IT SUNDAYS

Welcome to "Keeping it Real's" new weekly feature - 'Diggin It Sundays" where I discuss all the latest things that get me excited.  And so, with no further ado.....the first installment for your reading and viewing pleasure.
Enjoying the view of apples ripening in the sun from my sewing room window.
And then picking them with my son and daydreaming about boiling them down into pectin.  It never happened but I had fun thinking I would.
 Love scoring super cheap basil in copious amounts for Hemp Seed Miso Pesto.  
 Enthralled with my mini loaf pans.  They have been getting a workout making zucchini bread and banana chocolate chip loaves.  
I've been impressing myself with the huge stockpile of frozen goods I've managed to make this past couple of weeks.  The freezer is chock full of baby food purees, kale, chard, pesto, string beans and rhubarb.
Enjoying the waft of drying raspberry leaves from my hall closet.

Knitting bliss on circular needles using eco undyed wool.  This is the second pair of wool soakers for baby Jude using the same wonderful pattern for Picky Pants.  Jude lives in them.  He often sports drool and food catching bibs as well.  I've been sewing like a mad woman after the kids have gone to bed in order to keep up with his drooly habits.
 Really appreciating all the hand knit socks our kind neighbours keep sending over for the kids.
Both Scott and I are addicted to the HBO show "Entourage".  I keep reserving them at the library and then watching them at night while I knit.  Scott wishes I wouldn't knit while we veg out in front of the tv but it's the only time I get to knit so I do it anyway.

Saturday, August 13, 2011

FEEL THE RHYTHM OF THE BEET

The beets were bulging out of the ground, and so it was time to pickle.  I've discovered that it only really makes sense to can and preserve when you grow your own produce.  Luckily our beets really didn't mind the cool and wet temperatures of our coastal garden.  I really wish I could say the same for our tomatoes.  I am on the lookout for a good source of organic (or just not poisoned ones, I'm not really that picky) tomatoes for canning this year, and am in the process of negotiating a good deal.  Who knew preserving was such a hustle?  A strawberry farmer in the valley who apparently grows nice unsprayed strawberries wouldn't even let me come for a little u-pick this summer.  She has preferred clientele and basically told me not to bother driving out.  Wow.  I really need some fertile farmland so I can grow all of my own goods.  Geesh.  Anyway, so far our freezer is stocked with leafy greens and rhubarb, and now I have 5 jars of pickled beets.  It's going to be a lean winter.  
PICKLED BEETS

Makes about 6 x 500 ml jars.


10 cups (about 16 large) organic beets, prepared
2 1/2 cups  local organic apple cider vinegar
3 cups  water
¾ cups local honey

Method:  Prepare beets:  Scrub beets, leaving root and 5 cm of stem intact to prevent bleeding. Place beets in a large saucepan; cover with water; bring to a boil; cover and simmer 20 to 40 minutes until beets test tender with fork.  Be sure not to over cook.
Place 6 clean 500 ml mason jars on a rack in a boiling water canner; cover jars with water and heat to a simmer (180°F/82°C). Set screw bands aside; heat SNAP LID sealing discs in hot water, not boiling (180°F/82°C). Keep jars and lids sealing discs hot until ready to use.
Combine the vinegar, water and honey in a stainless steel saucepan. Bring to a boil; cover and reduce heat, keeping solution hot.
Drain beets; rinse with cold water to cool; slip off the skins removing tap root and stems. Quarter beets to yield 14 cups.
If necessary, return pickling liquid to a boil. Pack beets into a hot jar to within 2 cm of top of jar. Add hot pickling liquid to cover beets to within 1 cm of top of jar (headspace). Using nonmetallic utensil, remove air bubbles and adjust headspace, if required, by adding more beets and hot brine. Wipe jar rim removing any food residue. Centre hot sealing disc on clean jar rim. Screw band down until resistance is met, then increase to fingertip tight. Return filled jar to rack in canner. Repeat for remaining beets and hot brine.
When canner is filled, ensure that all jars are covered by at least 2.5 cm of water. Cover canner and bring water to full rolling boil before starting to count processing time. At altitudes up to 1000 ft (305 m), process –boil filled jars – 30 minutes.
When processing time is complete, remove canner lid, wait 5 minutes, then remove jars without tilting and place them upright on a protected work surface. Cool upright, undisturbed 24 hours; DO NOT RETIGHTEN screw bands.
After cooling check jar seals. Sealed discs curve downward and do not move when pressed. Remove screw bands; wipe and dry bands and jars. Store screw bands separately or replace loosely on jars, as desired. Label and store jars in a cool, dark place. For best quality, use home canned foods within one year.

Monday, July 25, 2011

BAREFOOT AND FANCY FREE


One of my favorite summertime pleasures is walking barefoot in the dewy grass to harvest fresh herbs for my herbal tea in the morning.  The earth is so fresh and promising when the sun rises.  Tip toeing back into the kitchen, I enjoy the sight of the flowers floating in my cup as I breathe in the lovely fragrance that comes steaming up.  Today's tea was a gentle blend of fresh lemon balm leaves, chamomile, and lavender blossoms.  I recently discovered the awesomeness of Anise Hyssop leaves, but only harvest from that plant once a week because it isn't a very big plant yet and I don't want to wipe it out.  Anise Hyssop has a lovely black licorice taste which I enhance with just a drop of honey.  
I am still really enjoying Karen Solomon's Jam It, Pickle It, Cure It book.  So much so that I took out her other book  Can It, Bottle It, Smoke It from the library.  Today was a double header day in the kitchen as I tackled two recipes from these books for our supper tonight.  After purchasing awesomely huge grass fed beef burgers from the Farmer's Market this weekend, I decided now was a good time to make some homemade ketchup and burger buns.  Avoiding plastic packaging has meant that I've been buying conventional Heinz Ketchup that is bottled in glass in lieu of our usual organic varieties that come in plastic.  This hasn't really felt right to me, and I am getting kind of tired of eating sicky sweet ketchup from poisoned tomatoes.  Let me just say I AM NEVER BUYING KETCHUP AGAIN!  Homemade ketchup is so amazing, I was licking the spoon and dipping each bite of my burger in it (which you would never find me doing with Heinz - oh yeah baby, there are other kinds).  I am really hoping that I score some bulk organic tomatoes this year for canning and preserving because then I can make vats of ketchup to gorge on all winter.
The homemade burger buns were very awesome too.  I've kind of avoided making burgers and hot dogs because most buns come in plastic bags, and I wasn't really satisfied with any of my earlier attempts at making them.  Luckily I made two batches of these suckers so I don't have to worry about those for the rest of the summer.  Now, I have adapted both recipes.  Karen's method for making the buns was kind of odd because she adds the yeast right into the flour without letting it foam in liquid first.  I tried her method for the first batch, and was disappointed to find yeast granules flecked throughout the dough!  They turned out okay anyway, but I tried a second batch the way I usually work with bread dough and was much happier with the the way they rose so have listed my way in the recipe posted here.  For the ketchup I used apple cider vinegar instead of the suggested champagne vinegar, and coconut sugar instead of brown.  I also didn't have any cheesecloth so just threw the spices right into the pot and just fished out the cloves and cinnamon before refrigerating.....no biggie.
KICK ASS KETCHUP
(adapted from Jam It, Pickle It, Cure It by Karen Solomon)

1 organic cinnamon stick
1 organic bay leaf
5 whole organic cloves
5 organic cardamom pods
10 organic black peppercorns
1 28-oz can organic whole tomatoes
1 large organic yellow onion, quartered
2 Tbsp organic sunflower or safflower oil
2 tsp sea salt
1/3 cup organic coconut sugar or 1/4 cup local honey
1/2 cup organic local apple cider vinegar
1 tsp organic Hungarian paprika
freshly ground organic black pepper

Method:  Using a piece of cheesecloth, tie the cinnamon, bay, cloves, cardamom, and peppercorns into a bundle.  Set aside.
Pour the tomatoes and their juice into a food processor or blender (I recommend a blender which I didn't use, but will next time).  Puree until totally smooth, and set aside all but about 1/4 cup.  To the remainder, add the onion and puree.
In a large Dutch oven, heat the oil over medium high heat.  Add the onion puree and the salt and stir well.  Cook for 8 minutes, letting the puree reduce.  Add the tomato, sugar, and vinegar, turn the heat to a low simmer, and reduce for about 15 minutes, uncovered, stirring occasionally.  Add the spice bundle and reduce for 10 minutes more.  When it is done reducing, it should be a little thinner than commercial ketchup.  Stir in the paprika, taste for seasoning and adjust as needed.  Let the ketchup cool and remove the spice bundle.  Pour into a jar and chill for at least 6 hours.

HAMBURGER (OR HOT DOG) BUNS
(adapted from Can It, Bottle It, Smoke It  by Karen Solomon)

5 cups (1 pound 11 oz) organic flour ( I used whole wheat and unbleached)
5 tsp active dry yeast
2 Tbsp local honey
1 Tbsp sea salt
2 Tbsp organic butter
1 cup organic whole milk
1 cup water

Method:  Pour the water and milk into a saucepan over the stove and warm until you can stick your finger into it without burning it.  Then pour it into a large, warmed bowl.  Stir in the honey and yeast.  Let stand 10 minutes until the yeast is completely dissolved and foamy.  Stir in the salt and butter.  When butter has melted,  add the flour, a few cups at a time, stirring until all the flour is absorbed 

Knead the dough by hand: Scrape the dough onto a well floured surface, sprinkle it with flour and knead it. Gather the dough together in your hands and push it away from you with your palms. Fold it in half towards you, then turn and turn and repeat pushing, folding, and turning, sprinkling a little flour if necessary on the dough to keep it from sticking. Keep kneading for several minutes, until the dough becomes smooth and elastic.
After kneading, put the dough in a large oiled bowl, and flip to coat both sides with oil.  Cover the bowl with a round plate, and place in a warm place (near a woodstove or in a gas oven that has a pilot light).  Let it rise for 1 hour, or until the dough has doubled. Punch the dough down to remove air bubbles, then roll the dough into a ball.  Stick your finger directly in the centre to make a small hole.  Use your fingers to widen the hole and work the dough, hand over hand as if you're pulling on a rope, into a large O-shape about 2 inches thick.  Cut the rope in half, then cut each half in half again, you will have 4 equal parts.  Cut each piece into thirds, resulting in 12 pieces total.  
     Keep the dough pieces covered in the bowl while you work.  One at a time, roll each piece into a ball.  For burger buns, press down on the dough ball to flatten its bottom.  For hot dog buns, pinch, stretch, and shape the dough into 7" long rolls.  Transfer the buns to greased baking sheets as your form them.  Let the dough rest on the sheets for 30 minutes, ensuring you cover them with floured dish towels.
     Preheat the oven to 400*.  Brush the tops of the buns with milk, place both sheets in the oven, and bake for 10 minutes.  Rotate each baking sheet 90* and switch racks (so that the top sheet moves to the lower rack and vice versa).  Bake for 10 minutes more, or until the tops are golden brown.  Let cool before serving.