Monday, July 25, 2016

HARVESTING SEAWEED

     Summer is the best time to harvest seaweed in Nova Scotia because the warmer water encourages the sea plants to grow, not to mention it's sunny and warm enough to make me think it would be a good idea. A few months back I helped organize this camping trip to the Bay of Fundy with some of the families from my children's school. We wanted the kids to discover where the seaweeds we commonly eat grow and how to properly (and safely) harvest them. So, I checked the tide charts and we arrived at that perfect moment when the ocean reveals her treasures to us for a brief time. It was spectacular.

     The three seaweeds we gathered were Dulse, Sea Lettuce, and Kelp. Not only do I love seaweed for it's amazing briny flavour, but for it's incredible nutritional properties as well. Did you know that seaweed is high in fibre and a wide range of essential nutrients including enzymes, nucleic acids, amino acids, minerals, trace elements and vitamins A, B, C, D, E and K? It's good for your heart, blood pressure, hormonal/lymphatic/urinary/digestive and nervous systems. Need I say more?
     Of the three, Dulse is the best eaten straight up out of the ocean, or savoured after it's been dried and packaged away for the winter. It's tender, delicious, and dare I say kind of like bacon? Sea Lettuce can be eaten fresh from the sea in salads, or you can dry it and reconstitute in water to make seaweed salad in the winter. All seaweeds make great additions to your wintertime soups too. My favourite way to enjoy both Dulse and Sea Lettuce is dried well and then crushed into flakes using my coffee grinder. These easy to use seasoning "sprinkles" taste fantastic on steamed vegetables, in salads, or on popcorn. Kelp can also be prepared in this way, but I mostly keep it in larger pieces once it's been dried and then I add it to my chicken stock and soups.


     For those of you interested in the more technical details of how to harvest seaweed I am more than happy to share the way I go about it. As I mentioned, you need to check the tide charts for the area you know for sure has the seaweed you are looking to harvest. This is the tricky part as you generally have to learn from someone else. You want to pick a day and time when the tide is at it's lowest point. Then you show up about half an hour before this time with large empty onion bags, a pair of scissors and an empty knapsack. At our particular spot, you have to walk WAAAAY out before you see the Dulse, Sea Lettuce or Kelp. Then you make sure you cut the seaweed off the rock leaving a bit behind so that the plant can regrow. When the tide starts coming in it's important to start heading back so you don't get stuck in water that is too deep for you. I always make sure to take a big bucket of clean seawater back with me so that just as I am about to lay them out to dry in the sun, I give them a quick dip in the water to remove any sand. I have specially built racks made using wood and snow fencing which I use to lay my seaweed on. I usually hang the kelp on the laundry line. Then you just let the sun do its thing until the seaweed is crispy dry. Then I bring it in and store it in paper bags.

Tuesday, July 5, 2016

BLACK BEAN BURRITOS

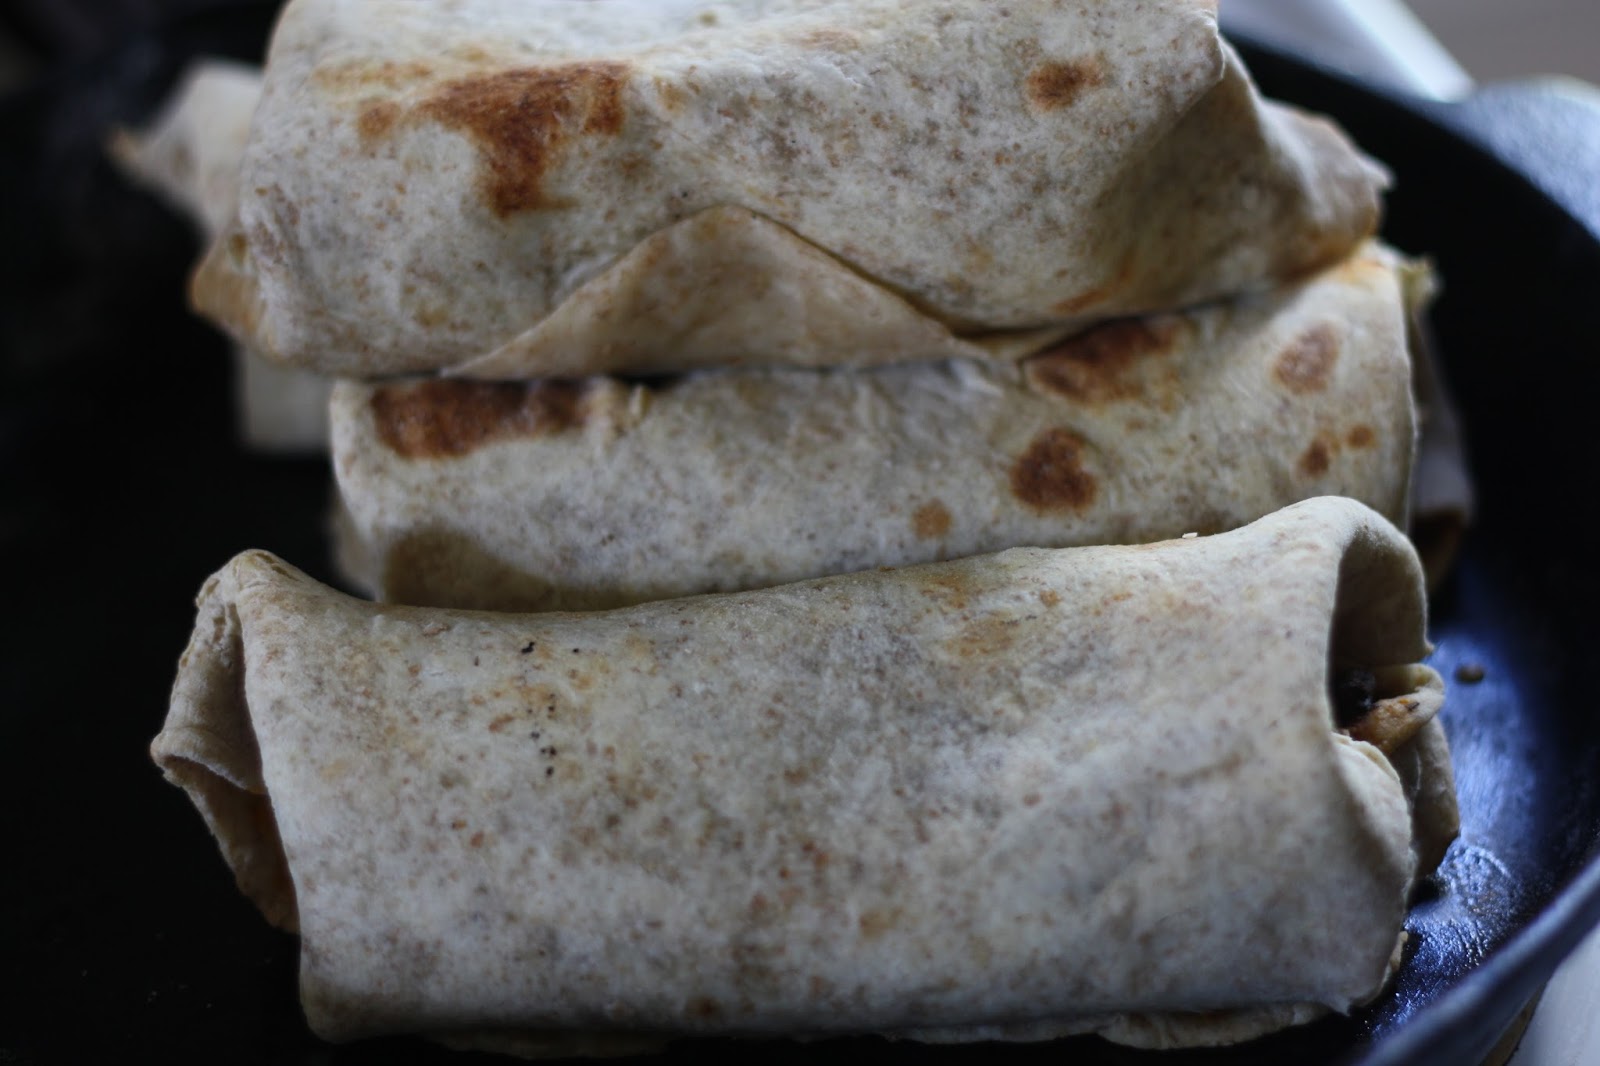
     It's hard to believe my burritos have yet to be featured on here because I've been making them for years and we all love them so much. The recipe has evolved over the years, and today I even made a gluten-free/dairy-free version for myself. But of course, I made my classic sourdough tortilla ones for the boys.
BLACK BEAN BURRITOS

Refried Black Bean Filling:

4 cups cooked black beans (or use pinto/kidney)
1 cup chicken broth
4 cloves garlic, grated
1 cup fresh cilantro, chopped
2 tsp cumin
1/2-1 cup salsa
1/4 cup apple cider vinegar
2-4 Tbsp molasses
sea salt and pepper

Method: In a medium pot, cool all ingredients on medium heat for 15-20 minutes, stirring occasionally. Remove from heat and mash with a fork.

Whole Wheat Sourdough Tortillas:

2 cups whole wheat flour
1 cup unbleached flour
3 1/2 Tbsp melted coconut oil/butter/ghee/lard
1 1/2 tsp sea salt
3/4 cup sourdough culture (at room temperature)
3/4 cup milk of choice (at room temperature)

Method: Combine the flours and salt in a large mixing bowl. Stir in the oil and then the sourdough and milk. Stir until it forms a ball. Knead for a few moments and then let it sit at room in a covered bowl for 12 hours.
To cook: Heat a large cast iron skillet over medium low heat. Pinch off a golf ball sized piece of dough and roll it out on a floured counter top. Place it on hot skillet and cook for about 1 minute on each side, or until a few light golden patches form - then flip it. Place on a plate and cover with a dish towel so they don't dry out - stack them on top of each other.
Gluten-Free Tortillas:
(makes 2 medium tortillas)

2 eggs
1 tsp melted ghee or coconut oil
1 Tbsp water
1/4 cup arrowroot flour
1 tsp coconut flour
pinch sea salt

Method: Crack the eggs into a medium sized bowl and whisk in the melted fat and water. Add the dry ingredients and beat well to combine. In a medium cast iron skillet over medium heat, pour in half of the batter and roll it around to evenly coat the bottom. Cook for 1 minute or each side. If saving for later, cool completely and store in an airtight container.
To Assemble:
Stir Fried Vegetables (broccoli, peppers, onion, carrot etc) seasoned with chili powder
Grated Cheese
Salsa
Olives

Topping:
Sour Cream or Yogurt
Salsa
Hot Sauce
Chopped Cilantro

Method: Spread each tortilla with salsa. On the edge closest to you place a mound of black beans and then vegetables. Top with grated cheese. Roll like a cigar and place in a pan or cast iron skillet. Bake in a preheated 350* oven for 10-15 minutes. Serve with toppings.

Sunday, June 5, 2016

MAKING GHEE

     Before I even get into all the reasons why ghee is so awesome, I thought I'd take a moment to explain what it is for those of you who have never made it. Ghee is clarified butter. It is a very common ingredient in French and Indian cooking.  It is also a major player in the world of Ayurveda, where it is prized for it's healing properties. You see butter is only 85% butterfat - the rest of it is made of milk solids and water. The process of clarifying the butter removes these "impurities" and what remains is golden and delightful.  
     There are so many reasons to love ghee. It is delicious, number one. It is excellent for cooking and sautéing because it has a high smoking point. Unlike butter, ghee keeps for about a month at room temperature or even longer in the fridge. It is rich in short and medium-chain fatty acids and butyrate (an anti-inflammatory fat). It is rich in fat soluble vitamins A, D, E (antioxidant for great skin, eyesight, hormonal balance), and K2 (builds strong bones). And it is okay for people who have casein or lactose sensitivities - who would have thought butter could be better?
Uses for ghee:
* Spread it on toast
* Melt over steamed vegetables, potatoes, and rice
* Sautee your spices in ghee and add to soups and stews
* Soothe a burn by rubbing ghee on it!


GHEE

1 pound unsalted organic butter

Method: Melt butter in a saucepan over medium low heat. Once it's fully melted, allow it to continue
to heat until it comes to a gentle boil. The milk proteins will first form a thin white layer over the entire surface, then expand into a thicker foam. Eventually, as the butter boils, the foam coating will break apart into smaller clusters. Technically, it's not the butterfat but the water in the butter that's boiling—that's a good thing, since we want the water to cook off. The foam will ultimately sink to the bottom of the pot as the butter continues bubbling away. You'll know that it's nearly done when the bubbling activity calms and then mostly ceases, evidence that the water is finally gone.
At that point, just pour the remaining butter through cheesecloth or a coffee filter to remove the browned bits. 

Sunday, May 8, 2016

CELEBRATING MOTHERHOOD (with Ice Cream Sundaes)

     We invited my mom over for brunch to celebrate Mother's Day. After enjoying some awesome Sausage and Roasted Vegetable Frittata, Crispy Potatoes and a nice salad it was time for the main event - make your own sundaes. I made a batch of Maple Vanilla Coconut Ice Cream and a variety of toppings which included Maple Chocolate Sauce, Caramel Sauce, Cherry Sauce and Roasted Peanuts and Pecans. Mom went in for a classic Banana Split and I had numerous helpings of a Butter Pecan stylie sundae and kept it simple with just pecans and caramel sauce. Insanely good. I love my mom!


MAPLE VANILLA ICE CREAM

4 egg yolks
1/2 cup maple syrup
2 cans coconut milk (800 ml)
200 ml milk of choice (I used Coconut Dream Beverage)
1 Tbsp real vanilla extract
1 tsp sea salt

Method: In a bowl, whisk the egg yolks with maple syrup until well combined.
Combine the coconut milks in a saucepan over medium low heat and bring to a simmer. Gradually whisk into the egg mixture. Return entire mixture to the stove and cook over low heat, stirring often until the mixture is thick enough to coat the back of a wooden spoon. Let cool and then stir in the vanilla and salt. Place in the fridge until completely cold or overnight. Transfer to an ice cream maker and freeze according to manufacturers instructions.

CARAMEL SAUCE
from Daniel Walker's Against All Grain

1/2 cup honey
1 1/2 Tbsp palm oil shortening or butter or ghee
1/2 cup coconut milk
1/2 tsp sea salt

Method: Bring the honey to a low boil in a deep saucepan over medium high heat. Simmer on medium for 5-7 minutes, whisking occasionally. Remove from heat and carefully whisk in the oil, coconut milk and salt. Return to heat and continue to cook for 15 minutes. Serve warm or room temperature.

CHOCOLATE SAUCE

1/2 cup coconut oil
60 grams cocoa powder
1/2 tsp sea salt
1/2 tsp real vanilla
1/2 cup maple syrup

Method: Whisk all ingredients into a small saucepan and whisk and warm on medium heat until all the oil melts. Serve at room temperature.


Tuesday, April 26, 2016

TAHINI TREAT

     After spending the last two weeks eating this awesome treat everyday (and sometimes two and three times a day) I've decided it is finally time to share the recipe with you. I'm warning you though, it is so good, and apparently very addictive. This should really come as no surprise to me though as I do recall being quite addicted to this yummy halvah I use to buy at the health food store years ago. I used to eat that stuff like it was going out of style too. I must have a thing for tahini. Luckily tahini is quite nutritious - for example it is a very good source of fibre, protein, vitamins and minerals including iron, magnesium, phosphorus, potassium, copper and manganese. It's good for your heart, it boosts nutrient absorption, it helps you burn fat, it fights cancer - it's a super food! But most importantly it tastes delicious and perfectly binds the fruit, raisins and hemp seeds together - making it spoonable and crazy yum.


TAHINI TREAT

1 apple, diced
1 banana, peeled and chopped
2 Tbsp raisins
3- Tbsp hemp nuts
about 3-4 Tbsp tahini

Method: Combine all ingredients and enjoy with a spoon.

Monday, April 4, 2016

BLACK FOREST BIRTHDAY CAKE

I know it's probably pretty obvious, but I love to bake. I especially love to bake birthday cakes. People really love it when you bake them a birthday cake too. It's a win-win situation. It's also pretty obvious that I am no vegan, but when I make chocolate cake I always use this recipe, which just so happens to be vegan - and seriously moist and delicious. It adapts really well to a black forest theme too when you slather it with coconut whipped cream and cherries. Yum.


BLACK FOREST CAKE
(makes one 6” layer cake)
¾ cup organic whole wheat flour
1 cup organic unbleached white flour
2 tsp baking powder
1 tsp baking soda
¾ cup organic cocoa powder, sifted
½ tsp sea salt
1 cup organic unsweetened coconut beverage
½ cup avocado oil
1 ½ cups local maple syrup
1 tsp organic apple cider vinegar
2 tsp pure organic vanilla

Method: Preheat oven to 350*.  Prepare two 6” round cake pans by greasing them with some oil and then lining with parchment paper cut into rounds.  Sift the flours, baking powder, baking soda, and salt together into a bowl.  Heat milk in a small saucepan over medium heat, and then stir in the cocoa powder until dissolved.  Whisk the oil, maple syrup, vinegar and vanilla into the cocoa mixture.  Stir the wet ingredients into to the dry.  Pour into prepared cake pans and bake in 350* oven for 45-60 minutes in cake pans and for 22 minutes in the cupcake pan.  Allow to cool on a  baking rack for 10 minutes before removing cakes from pans.  Cool completely before icing.

CHERRY FILLING
 5 cups frozen organic cherries
1/4-1/2 cup maple syrup
2-3 Tbsp organic corn starch

Method: Place the cherries and maple syrup in a saucepan over medium high heat. Dissolve the cornstarch in a bit of cold water and then stir into the hot cherries. Stir until it thickens to desired consistency. Cool and refrigerate.

WHIPPED COCONUT CREAM

1-2 14 oz cans full fat coconut milk
1/4-1/2 cup organic icing sugar or a bit of maple syrup
1/2 tsp vanilla

Method: Chill cans of coconut overnight in the fridge. Chill a large mixing bowl in freezer. Remove just the solid coconut cream on the top and leave the liquid behind for use in a smoothie or something. Beat for 30 seconds with a mixer then add sifted icing sugar and vanilla. Use immediately or refrigerate.

To assemble the cake: Use a serrated knife to trip the domed top off of each cake. Pour 3/4 of the cherry mixture on the bottom half and then top with some whipped cream. Place the second layer on top. Use the rest of the whipped cream to ice the cake, then pour the rest of the cherry mixture in the centre of the top of the cake. Sprinkle with shaved dark chocolate and gently press some on the sides of the cake too. Refrigerate to harden the icing a bit. 

 PRINT RECIPE

Friday, April 1, 2016

FEARLESS DETOX

Detox is not as scary as you think!

     In fact, your body is doing it all the time and you're doing just fine. Traditionally the liver and gallbladder are associated with the Spring season, making now the ideal time to enhance liver and gall bladder function. Without strong liver function, detoxification is hindered in the body. Rather than thinking of a detox as something you do to your body - consider it more of a time to support and nourish the organs responsible for detoxifyIng the body (all year round). A healthy detox program emphasizes eating healthy foods and incorporating holistic practices that just make it easier for the digestive and detoxifying organs of the body to move accumulated waste or toxins out, as well as decreasing the toxic burden we generally put on our bodies.    
     After a winter of excess and hibernation, it feels good to switch gears and give our bodies a little attention in the spring. You know how nice it feels to drive your car home after getting a tune-up? The oil is squeaky clean, the fluids have been topped off, windshield wipers have been changes, tire pressure is at that perfect level, and you've vacuumed and washed the car until it shines? Well, just like our cars need some care and maintenance in the spring, so do our bodies.
     Some people freak out at the idea of a spring detox. It's not wonder - there are so many detox kits and programs out there that just scream DEPRIVATION, and I for one have no desire to live without the pleasure of food and eating. Juice fast? Forget it. Master cleanse? No way. I am happy to announce that maintenance does not mean liquid juice fast or maple syrup and lemon juice for days on end.

     As a registered holistic nutritional consultant and yoga teacher, I understand that the best way to support your body in it's effort to keep you healthy is to nourish and support with whole foods, gentle tonic herbs, and invigorating yoga. I've created a 7- Day Spring Detox that is effective and fun to do. There is absolutely no reason to be scared because you will NOT feel deprived. We are going to keep it simple and eat wholesome, delicious foods. The only thing you have to lose is some unwanted poundage, dark circles and puffiness under your eyes, and that feeling of lethargy that has been dragging you down.
     The Spring Detox has everything you will need: a step by step guide, the recipes, a shopping list and meal planner, holistic detox strategies, and yoga videos for vitality and wellness. You are invited to join the program and eat your way to vitality in 7 days!
The Keeping It Real SPRING DETOX E-Course launches on April 10th.
Early Bird Registration is on now - sign up today and save!
Regular Price $40 - You pay just $32