Monday, July 25, 2016

HARVESTING SEAWEED

     Summer is the best time to harvest seaweed in Nova Scotia because the warmer water encourages the sea plants to grow, not to mention it's sunny and warm enough to make me think it would be a good idea. A few months back I helped organize this camping trip to the Bay of Fundy with some of the families from my children's school. We wanted the kids to discover where the seaweeds we commonly eat grow and how to properly (and safely) harvest them. So, I checked the tide charts and we arrived at that perfect moment when the ocean reveals her treasures to us for a brief time. It was spectacular.

     The three seaweeds we gathered were Dulse, Sea Lettuce, and Kelp. Not only do I love seaweed for it's amazing briny flavour, but for it's incredible nutritional properties as well. Did you know that seaweed is high in fibre and a wide range of essential nutrients including enzymes, nucleic acids, amino acids, minerals, trace elements and vitamins A, B, C, D, E and K? It's good for your heart, blood pressure, hormonal/lymphatic/urinary/digestive and nervous systems. Need I say more?
     Of the three, Dulse is the best eaten straight up out of the ocean, or savoured after it's been dried and packaged away for the winter. It's tender, delicious, and dare I say kind of like bacon? Sea Lettuce can be eaten fresh from the sea in salads, or you can dry it and reconstitute in water to make seaweed salad in the winter. All seaweeds make great additions to your wintertime soups too. My favourite way to enjoy both Dulse and Sea Lettuce is dried well and then crushed into flakes using my coffee grinder. These easy to use seasoning "sprinkles" taste fantastic on steamed vegetables, in salads, or on popcorn. Kelp can also be prepared in this way, but I mostly keep it in larger pieces once it's been dried and then I add it to my chicken stock and soups.


     For those of you interested in the more technical details of how to harvest seaweed I am more than happy to share the way I go about it. As I mentioned, you need to check the tide charts for the area you know for sure has the seaweed you are looking to harvest. This is the tricky part as you generally have to learn from someone else. You want to pick a day and time when the tide is at it's lowest point. Then you show up about half an hour before this time with large empty onion bags, a pair of scissors and an empty knapsack. At our particular spot, you have to walk WAAAAY out before you see the Dulse, Sea Lettuce or Kelp. Then you make sure you cut the seaweed off the rock leaving a bit behind so that the plant can regrow. When the tide starts coming in it's important to start heading back so you don't get stuck in water that is too deep for you. I always make sure to take a big bucket of clean seawater back with me so that just as I am about to lay them out to dry in the sun, I give them a quick dip in the water to remove any sand. I have specially built racks made using wood and snow fencing which I use to lay my seaweed on. I usually hang the kelp on the laundry line. Then you just let the sun do its thing until the seaweed is crispy dry. Then I bring it in and store it in paper bags.

Tuesday, July 5, 2016

BLACK BEAN BURRITOS

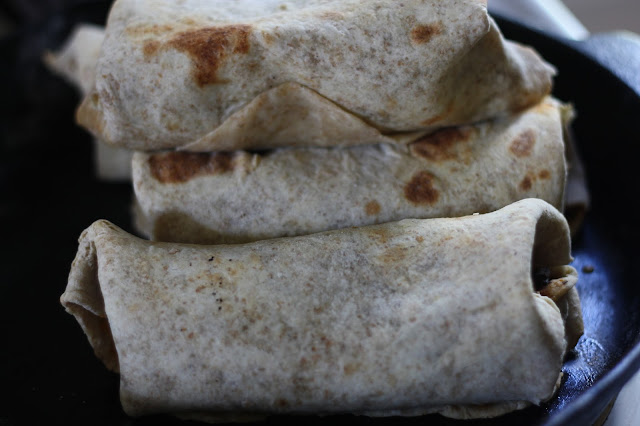
     It's hard to believe my burritos have yet to be featured on here because I've been making them for years and we all love them so much. The recipe has evolved over the years, and today I even made a gluten-free/dairy-free version for myself. But of course, I made my classic sourdough tortilla ones for the boys.
BLACK BEAN BURRITOS

Refried Black Bean Filling:

4 cups cooked black beans (or use pinto/kidney)
1 cup chicken broth
4 cloves garlic, grated
1 cup fresh cilantro, chopped
2 tsp cumin
1/2-1 cup salsa
1/4 cup apple cider vinegar
2-4 Tbsp molasses
sea salt and pepper

Method: In a medium pot, cool all ingredients on medium heat for 15-20 minutes, stirring occasionally. Remove from heat and mash with a fork.

Whole Wheat Sourdough Tortillas:

2 cups whole wheat flour
1 cup unbleached flour
3 1/2 Tbsp melted coconut oil/butter/ghee/lard
1 1/2 tsp sea salt
3/4 cup sourdough culture (at room temperature)
3/4 cup milk of choice (at room temperature)

Method: Combine the flours and salt in a large mixing bowl. Stir in the oil and then the sourdough and milk. Stir until it forms a ball. Knead for a few moments and then let it sit at room in a covered bowl for 12 hours.
To cook: Heat a large cast iron skillet over medium low heat. Pinch off a golf ball sized piece of dough and roll it out on a floured counter top. Place it on hot skillet and cook for about 1 minute on each side, or until a few light golden patches form - then flip it. Place on a plate and cover with a dish towel so they don't dry out - stack them on top of each other.
Gluten-Free Tortillas:
(makes 2 medium tortillas)

2 eggs
1 tsp melted ghee or coconut oil
1 Tbsp water
1/4 cup arrowroot flour
1 tsp coconut flour
pinch sea salt

Method: Crack the eggs into a medium sized bowl and whisk in the melted fat and water. Add the dry ingredients and beat well to combine. In a medium cast iron skillet over medium heat, pour in half of the batter and roll it around to evenly coat the bottom. Cook for 1 minute or each side. If saving for later, cool completely and store in an airtight container.
To Assemble:
Stir Fried Vegetables (broccoli, peppers, onion, carrot etc) seasoned with chili powder
Grated Cheese
Salsa
Olives

Topping:
Sour Cream or Yogurt
Salsa
Hot Sauce
Chopped Cilantro

Method: Spread each tortilla with salsa. On the edge closest to you place a mound of black beans and then vegetables. Top with grated cheese. Roll like a cigar and place in a pan or cast iron skillet. Bake in a preheated 350* oven for 10-15 minutes. Serve with toppings.